How to Properly Prepare ID Card Sizes for Printing Using Adobe Photoshop:
A Step-by-Step Guide for DigitalPrinting.ph
When creating an ID card design with Adobe Photoshop, achieving a precise and professional result is crucial. A frequent challenge in ID card printing is getting the size just right. If the dimensions aren’t accurate, your final product might not match your design expectations. Here’s a detailed guide to preparing the correct ID card size using Adobe Photoshop, ensuring your designs are perfectly aligned and print-ready.
Start by opening Adobe Photoshop and creating a new document:
- Width: 2.125 inches
- Height: 3.37 inches
- Resolution: 300 pixels per inch
- Color Mode: RGB
This setup ensures that your ID card design with Adobe Photoshop will be crisp and clear for printing.

Step 2: Adjusting Canvas Size for Bleed in Your ID Card Design
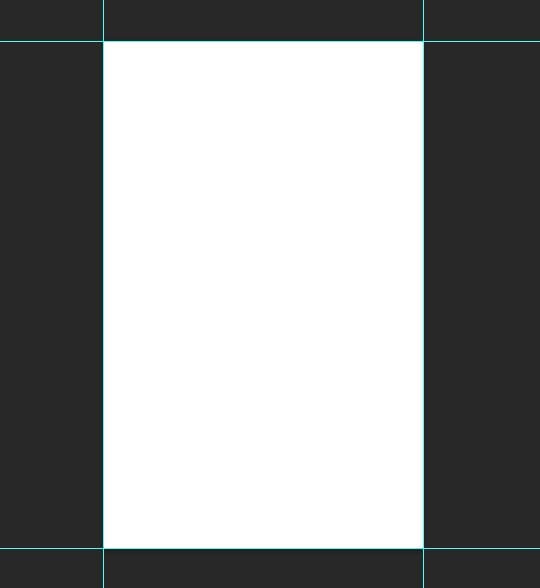
First, use the ruler tool to drag guides to the edges of your canvas. These guides will then help maintain the correct size of your ID card design.

Step 3: Unlocking the Background Layer for Flexible Design
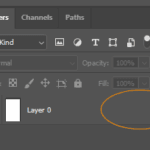
In the Layers panel, click the padlock icon on the background layer to unlock it.
Step 4: Adjust Canvas Size for Bleed
Next, go to Image, then Canvas Size, and increase the canvas size to:
width: 2.18 inches
height: 3.47 inches
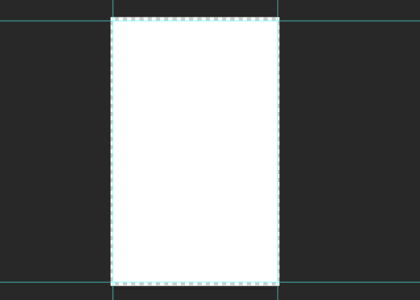
By adding this extra size, you create a bleed area, ensuring that your ID card design with Adobe Photoshop extends fully to the card’s edge. Consequently, this helps avoid unwanted white borders after trimming.


Step 5: Crafting the Perfect ID Card Design Layout
Place all essential elements like logos and text within the teal ruler outline, which marks the actual size of the printed ID card (2.125 x 3.37 inches).
Extend background elements to the edge of the canvas (2.18 x 3.47 inches) to ensure complete coverage. It is vital to prevent any white edges around your design after printing.
Step 6: Organizing Your Adobe Photoshop ID Card Design
Group the layers that comprise your ID card design to make it easier to manage and adjust different elements as needed. If you need to create multiple variations, such as for different cardholders, duplicating these groups simplifies the process.

Step 7: Renaming Layers for Easy ID Card Design Management
Maintain an organized file, rename each layer or group with the cardholder’s information. For example, use names like “Carla front” and “Carla back” for a cardholder named Carla.
Step 8: Exporting Your ID Card Design from Adobe Photoshop
Once your design is complete, select all groups and right-click to choose Quick Export As PNG. Save the files to your chosen location. The PNG format is preferred for its high quality and support for transparency, making it ideal for your ID card design.

Step 9: Uploading Your ID Card Design for Printing
Upload all your completed ID card files to Google Drive and store them in a single folder. Share the folder with cs@digitalprinting.ph to download your design and proceed with printing without delays.
Why Accurate ID Card Sizing with Photoshop and DigitalPrinting.ph Is Essential
Adobe Photoshop provides precise control over every element of your ID card design, ensuring a professional and polished look. Its capability to handle high-resolution images and detailed adjustments makes it perfect for creating a print-ready ID card design.
Meanwhile, DigitalPrinting.ph complements Adobe Photoshop’s capabilities by offering high-quality printing services tailored to your needs. Their expertise and commitment to quality ensure that your ID cards look exactly as intended, with vibrant colors and crisp details.
In conclusion, preparing your ID card design with Adobe Photoshop and using DigitalPrinting.ph’s services is a winning combination. By following these steps, you can ensure your ID cards are designed and printed to perfection. Happy designing! Order your ID card printing today.
Color Accuracy Disclaimer: While we make every effort to ensure accurate color representation in our ID card printing, exact color matching can be challenging. Due to the nature of the printing process, slight variations in color intensity and tone may occur. Consequently, the colors on the final printed ID cards may not exactly match the original design or artwork. Additionally, variations in monitor displays, printer settings, and material properties can affect color perception, leading to minor differences between the digital design and the printed product. We are committed to delivering the best possible quality, but please note that slight color differences may be observed between print batches or between the digital proof and the finished ID cards.
You can also watch the guide video.
Need Help or Have Questions?
If you have any questions or need further assistance with preparing your ID cards, feel free to reach out to us. We’re here to help!
Contact Us:
- Email: cs@digitalprinting.ph
- Viber: +63 947 805 0000
- Messenger: DigitalPrinting.ph
Our team at DigitalPrinting.ph is ready to assist you with all your ID card printing needs.


